

How To Get A Youtube Video Livestream Full Screen In Obs
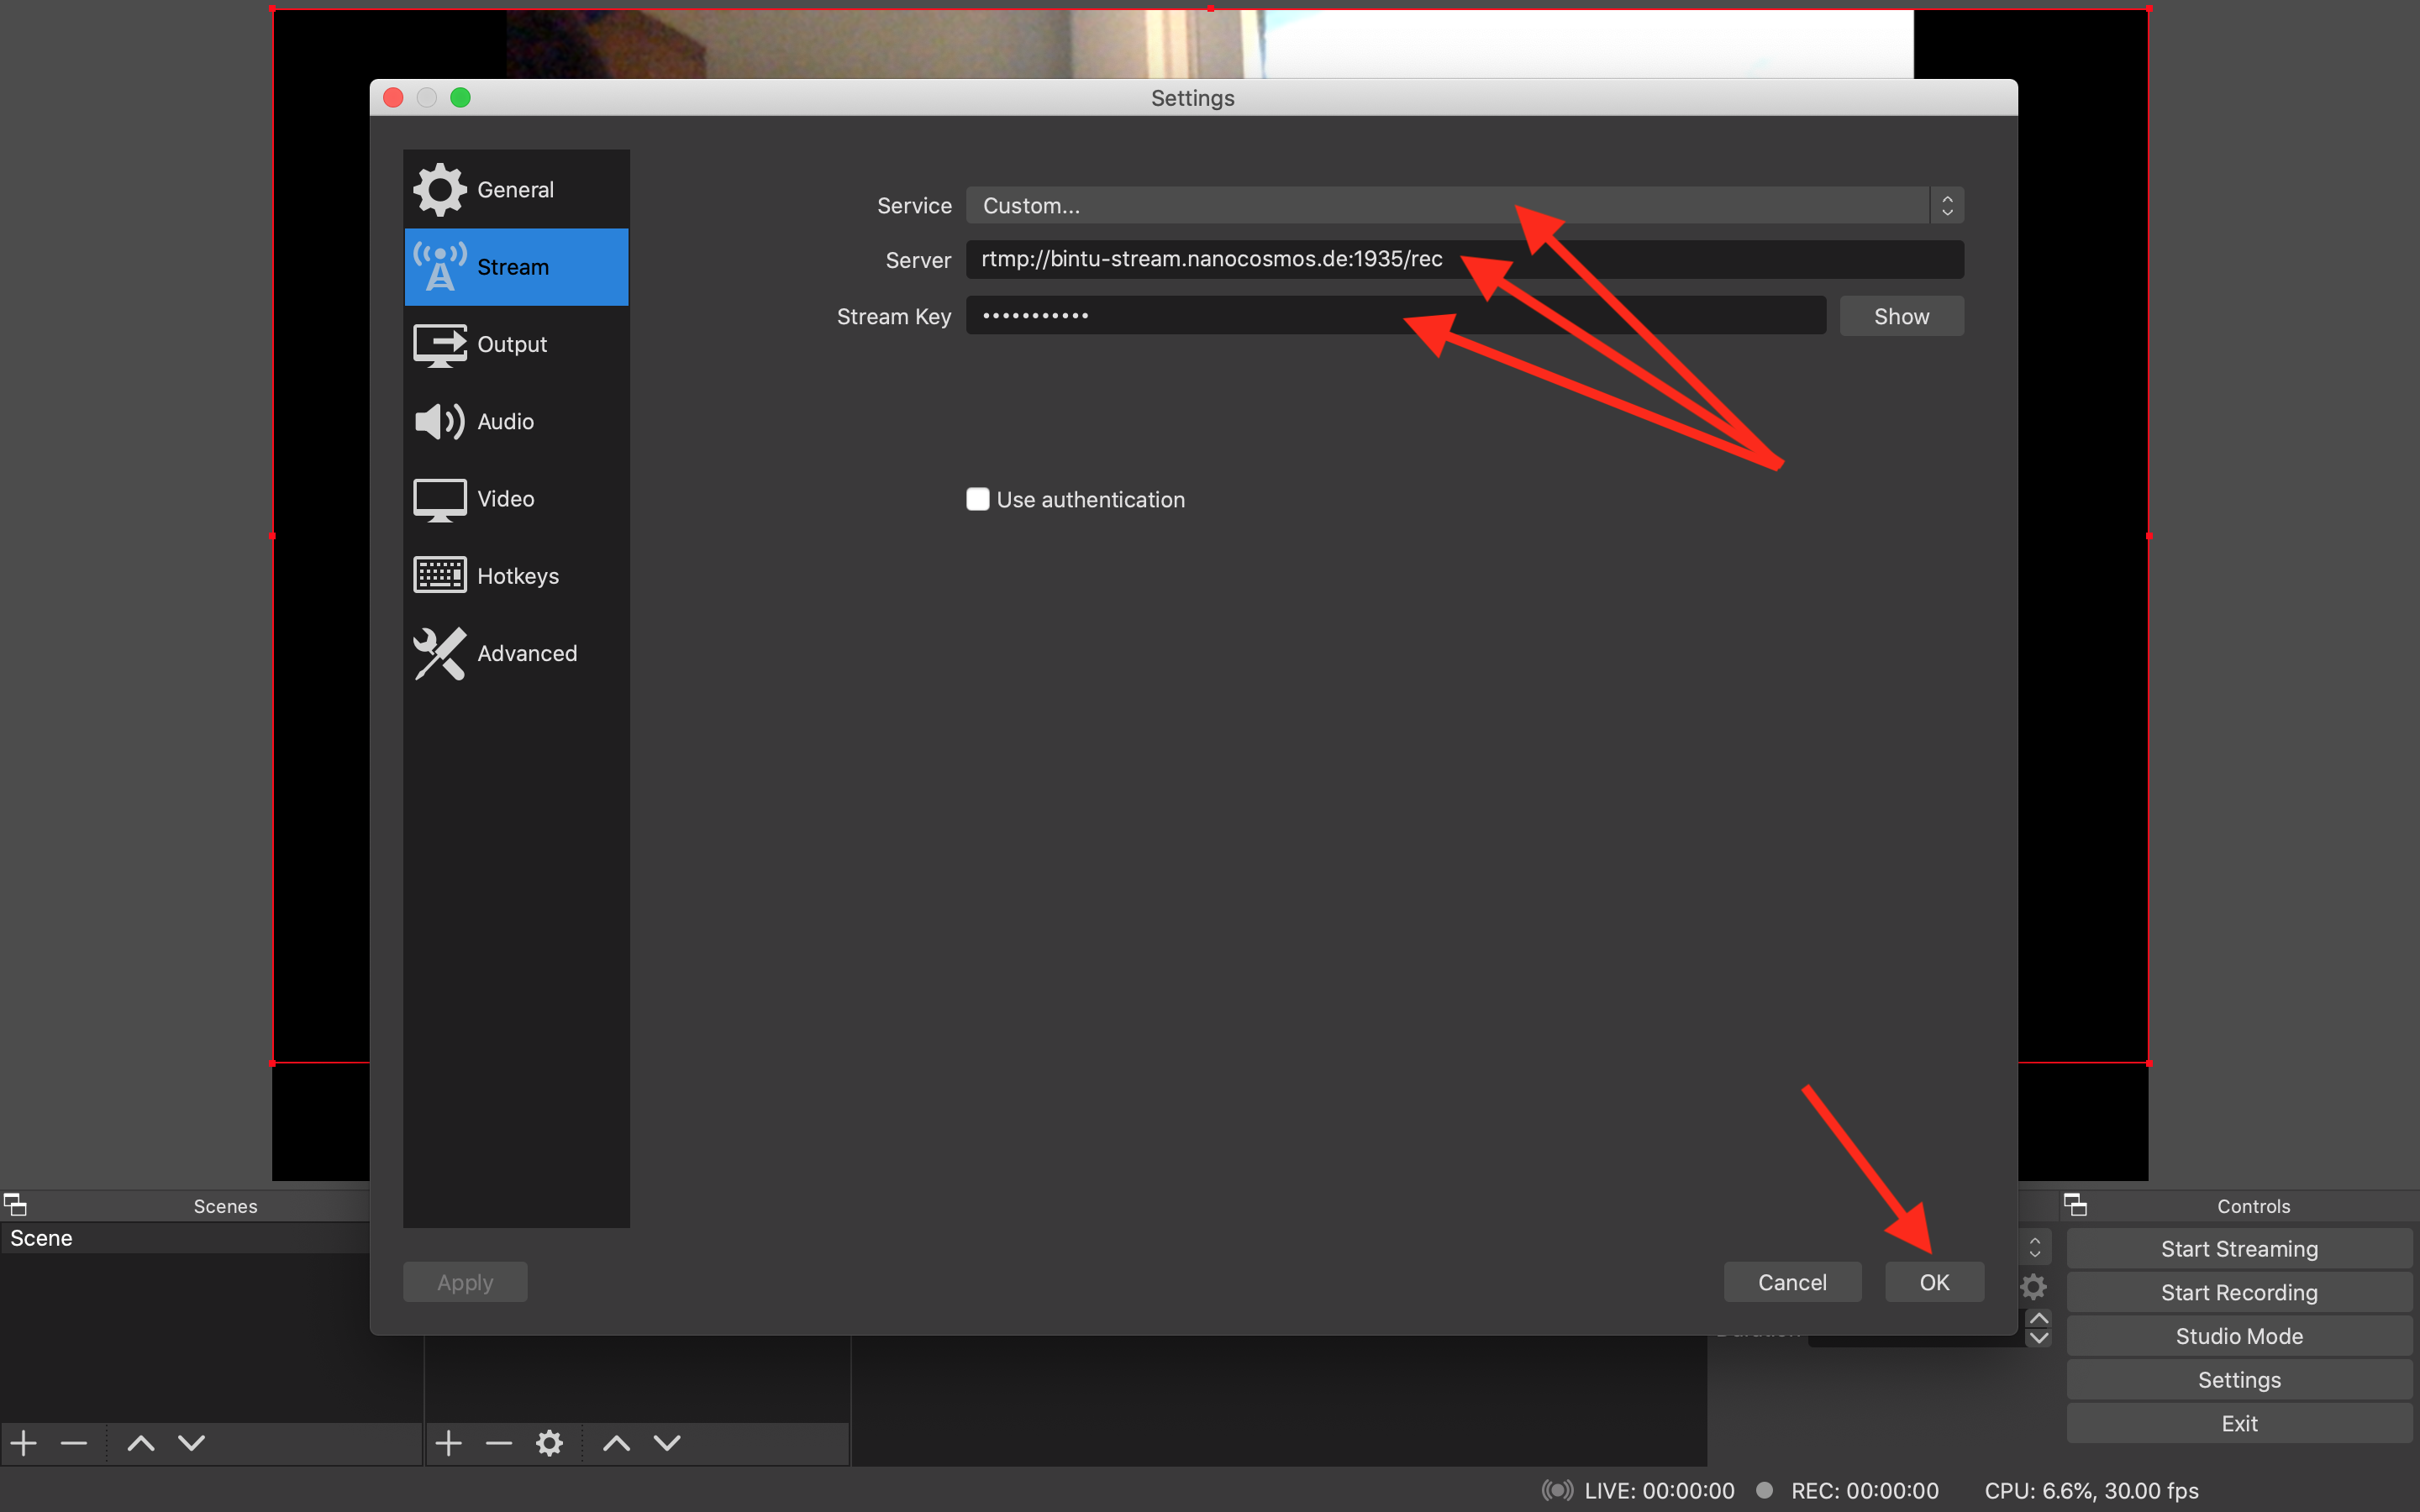
If you want to host a more professional-looking, high-quality stream then learning how to use OBS is a must. OBS stands for Open Broadcast Software. Information technology's a free tool for alive streaming and video recording. It tin can be used with PromoTix to create more engaging ticketed virtual events. Once yous have the fundamentals down and then yous can start mixing video, screen sharing, hosting guests, and more during your live stream. Begin past downloading OBS onto your computer. Once downloaded information technology's recommended that you click "Settings" in the lower right hand corner of the screen: Scenes are like presets and sources are the inputs that the scene shows. In that location are nearly infinite possibilities when information technology comes to creating scenes. You tin design multiple scenes and and so transition between them during your live stream. PromoTix is the world's first live streaming software to offering an easy way for event organizers, instructors, and creators to create ticketed, individual live stream events in just minutes. Earlier deciding what scenes to create it'southward helpful to create some sort of storyboard or timeline for your alive stream. Y'all can set up a different scene for each function of the stream. Transitions allow for motility from scene to scene. It tin be a simple cut, jump, fade or those more tech-savvy tin set more advanced transitions. In addition to your primary scene, basic scenes to consider including are: As mentioned before, in that location are a nearly space amount of scenes that y'all can create using OBS. Right now, we will cover the 5 basic scenes which are: For each scene, it's important to give information technology a name so that you can proceed track of which scene is which. You lot can even create carve up profiles for each blazon of stream you will be hosting. This way you lot have templates ready to get and do not need to spend time before each individual stream setting information technology up. This may seem really unproblematic simply it's important to gear up up both the video and audio so that the quality is amend. If you lot do not select an audio source then it will pull from the default settings. Pro tip: Wear headphones! This will help with feedback and prevent your microphone from picking upward other audio. Even if you do not have a fancy microphone, getting wired headphones with a microphone volition brand a huge divergence vs just using your computer mic. If yous desire to employ multiple camera angles then you volition need more than one photographic camera. Prepare up as many sources for as many cameras that you have. And then you tin apply transitions in between so you tin can switch. Once y'all are an avant-garde user y'all tin can fifty-fifty prepare hotkeys to allow for seamless switching. Follow the same steps as higher up simply add together one additional source. One time you add together the prototype in y'all will be able to place it wherever you encounter is the all-time fit. When adding a unproblematic banner information technology should be adequately easy to place in the scene. If y'all are looking to get more creative and pattern more than of a frame for your stream, so y'all volition demand to create an image that has a spot for the video. PIXLR or Canva are ii free online tools that tin assist you create beautiful overlays, banners, and frames. Whether y'all are looking to share a slideshow presentation, a web page, or walk through a tutorial, screen sharing is a dynamic way to create a more engaging stream. In that location are a few unlike means that you lot tin become near sharing your screen in OBS. Pro Tip: If you notice your display is cut off then right-click, select transform, and then choose fit to screen. If you lot find that you are not seeing any options to brandish and then you may demand to adjust some settings. When using a Mac computer y'all will need to set the permissions. You can do this by selecting "Testify windows with empty names". Choose an option with (nada). And then you lot volition exist prompted to let for screen recording in your arrangement preferences. Follow the same steps above to share your screen simply as well add in a video source to the aforementioned scene. In one case you add the video source in you will see that you can move it around. Place the video where you find information technology doesn't block the screen y'all are sharing. If you desire to really pace things up you tin can even create an overlay for the scene and then that it looks more than polished. Be sure that where y'all want to put the video or screen share that the image is transparent. This can be added by adding an image to the sources for this scene. This will require the utilise of an outside video chat platform similar Skype or Zoom to feed in the video of your guest. From there you can either choose window capture or if you take more than than i monitor you can put the video chat on that monitor and crop that display. This volition forestall a "flicker" effect from happening to the video chat. If yous desire both of you on the screen at the aforementioned time and then you will need to ready a scene that has your webcam video input, your sound input, and a window capture with the video chat awarding selected. In addition, if you want it to look cleaner then you may want to add an epitome overlay. Consummate the steps listed higher up and place your video and your invitee's videos where looks best. When using a Mac computer then you will besides demand to install a plugin in guild to go the audio of your guest. A helpful option is "iShowU Audio Capture". Once you install it yous will also need to change the settings on your reckoner to combine multiple audio interfaces. Be sure once you lot have finished this that yous click the speaker volume push on your figurer and select the multi-output device or whatsoever you lot named this new setting. Then you've published your PromoTix event, you've gear up OBS exactly how you desire it, and now you lot're set up to become live! Be sure to lookout the video at the top of this page, or just but follow these steps: Create engaging and dynamic live streams with OBS on PromoTix. Set up your account and start selling tickets to your virtual event right abroad. OBS broadcast tutorial video for PromoTix
How does OBS piece of work?
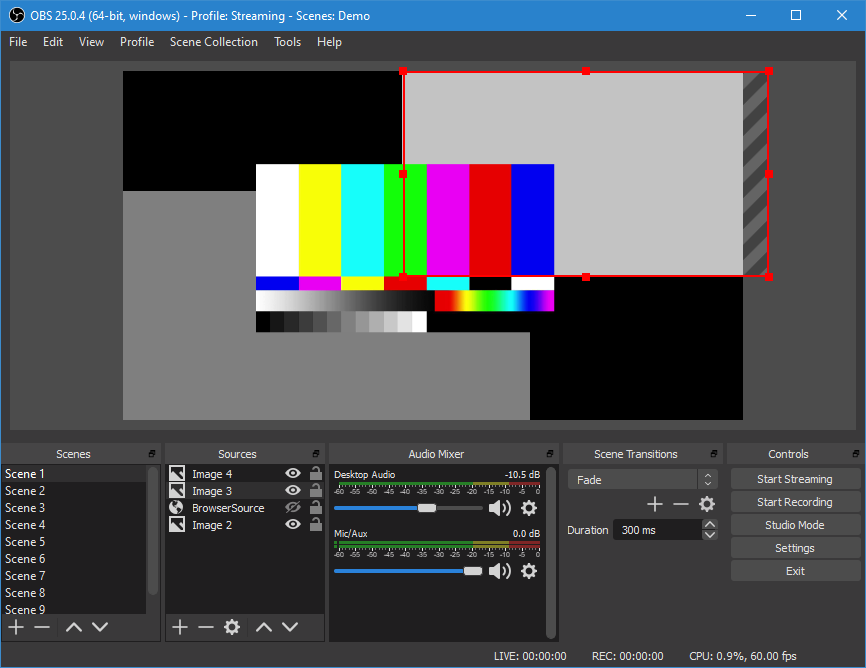 One time y'all've downloaded OBS, it may seem overwhelming and confusing at commencement but it's actually pretty unproblematic to use. The master place y'all will want to focus on is the bottom left corner, the scenes and sources columns.
Earn acquirement with PromoTix and OBS

Set scenes
Principal scene
Webcam only
Webcam with epitome overlay
Screen share merely
Screen share with webcam
Host a guest
Going live on PromoTix using OBS


Become started In minutes

Source: https://blog.promotix.com/how-to-use-obs-promostream
Posted by: jonesstabothe.blogspot.com
0 Response to "How To Get A Youtube Video Livestream Full Screen In Obs"
Post a Comment